How to Configure MS Office Outlook Express 2013

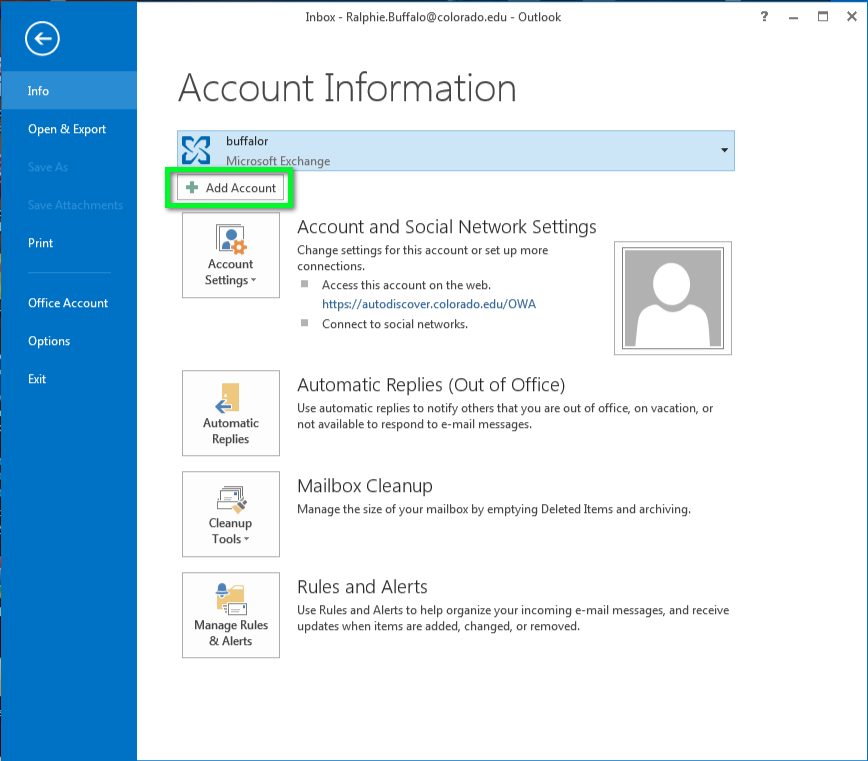
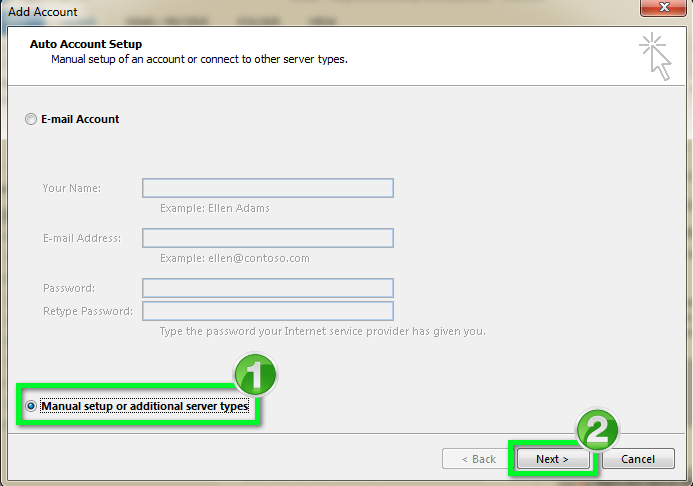
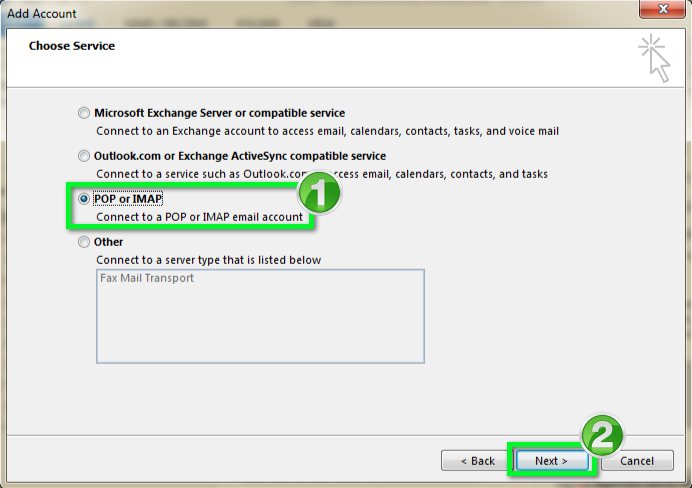
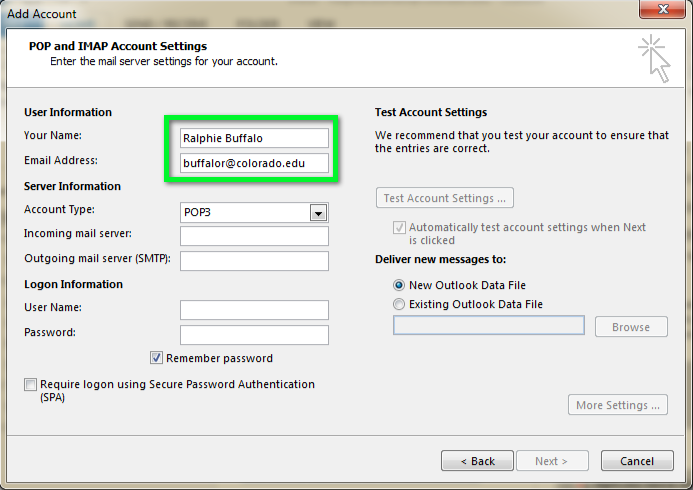
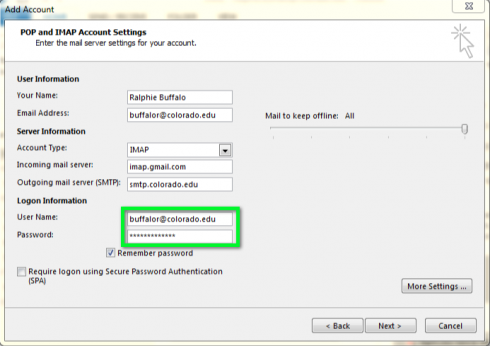
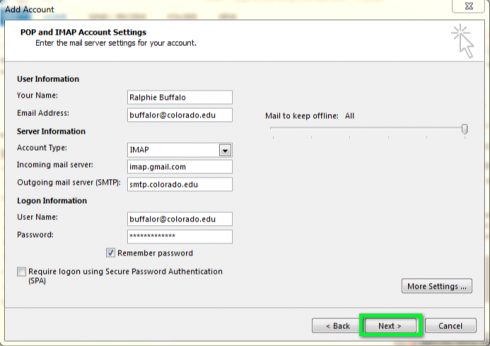
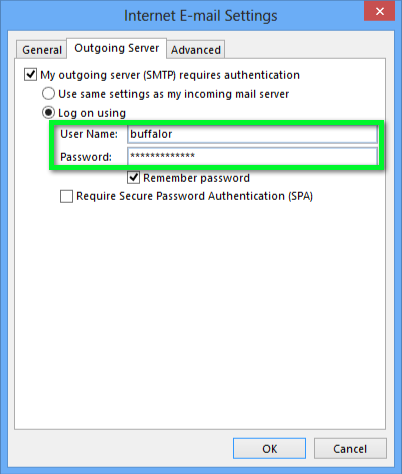
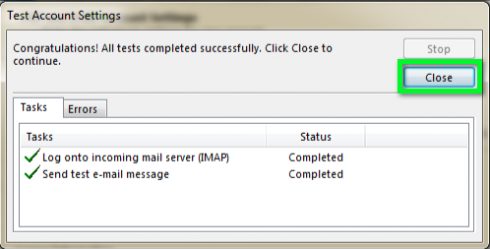
This tutorial demonstrates how to configure Outlook 2013 on Windows for @uvas.edu.pk Gmail accounts.

This tutorial applies to the following operating system(s):

WINDOWS

You may need to enable IMAP for your account prior to configuration of your email client (https://mail.google.com). To do this: 

  1. From the Gmail web client, click Settings from the cog menu.
  2. In the POP/IMAP Download tab, click Enable IMAP.
  3. Click Save Changes.

Step 1

From the File Menu, select the Info tab and click Add Account.

Visual representation related to step 1

Step 2

Click Manual setup or additional server types and click Next.

Visual representation related to step 2

Step 3

Select POP or IMAP and click Next.

Visual representation related to step 3

Step 4

In the User Information section, enter:

  • Your name: (desired display name)
  • Email address: CULoginName@colorado.edu
Visual representation related to step 4

Step 5

Enter the following for your server settings:

  • Account Type: IMAP
  • Incoming mail server: imap.gmail.com
  • Outgoing mail server (SMTP): smtp.colorado.edu
Visual representation related to step 5

Step 6

Enter the following for Logon Information:

  • User name: CULoginName@colorado.edu
  • Password: IdentiKey password
Visual representation related to step 6

Step 7

Click More Settingsā€¦

Visual representation related to step 7

Step 8

On the Outgoing Server tab, check the box next to My outgoing server (SMTP) requires authentication.

Visual representation related to step 8

Step 9

Click the Log on using radio button.

Visual representation related to step 9

Step 10

Enter the following for Log on using:

  • User name: CULoginName
  • Password: IdentiKey password

*Note: Be sure that the username does not have @colorado.edu included or you mail will not be able to send.

Visual representation related to step 10

Step 11

On the Advanced tab, make the following configurations:

  • For Incoming server (IMAP), select SSL from the drop-down menu.
  • For Outgoing server (SMTP), select TLS from the drop-down menu.

*Note: If you are experiencing issues connecting with port 25 for Outgoing server (SMTP), try changing this to port 587.

Visual representation related to step 11

Step 12

Click OK.

Visual representation related to step 12

Step 13

Click Next.

Visual representation related to step 13

Step 14

Outlook 2013 will test your account settings. If it completes successfully, click Close.

*Note: If it does not complete successfully, review this document and check your account settings again. Your outgoing mail server settings will be slightly different from your logon information. 

Visual representation related to step 14

Step 15

Your account will now be configured.